
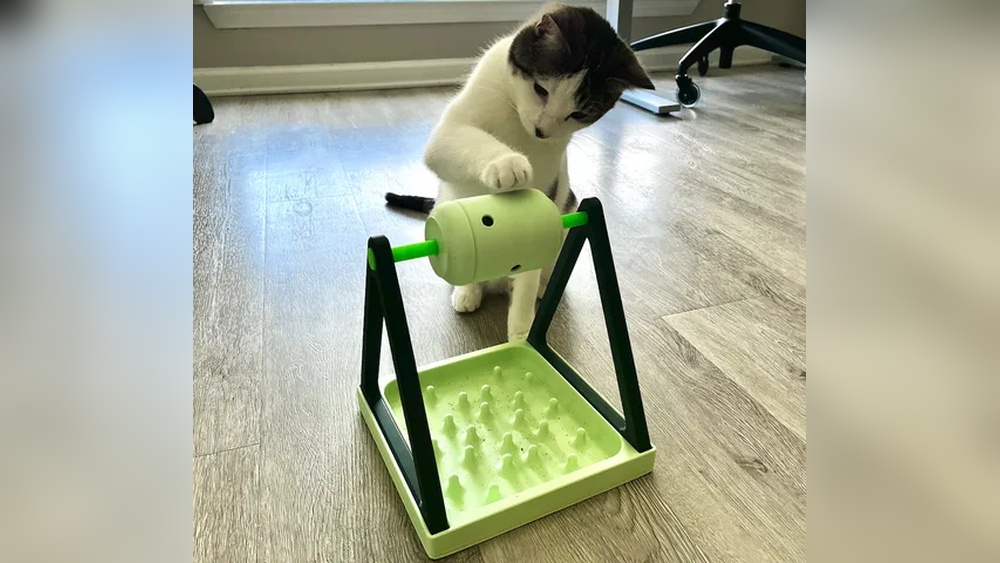
Are you looking for a fun and creative way to spoil your feline friend? Imagine making a unique cat toy that’s just right for your pet—one that’s safe, durable, and designed by you.
With 3D printing, you can bring this idea to life easily and affordably. In this guide, you’ll discover simple steps to create a custom cat toy that your kitty will love. Ready to turn your ideas into a playful reality?
Keep reading and let’s get started!
Choosing The Right Design
Choosing the right design for your 3D printed cat toy is key to making it fun and safe. The design affects how your cat plays and how long the toy lasts. Think about your cat’s personality and play style before starting. A good design keeps your cat interested and active.
Simple Vs Complex Shapes
Simple shapes are easy to print and usually safe. They use less material and print faster. Cats like balls and rings because they can chase and bat them around. Complex shapes look cool but take longer to print. They may have small parts that can break or hurt your cat. Choose simple shapes for quick toys and complex ones for special gifts.
Incorporating Interactive Elements
Interactive elements make toys more fun. Think about adding holes, moving parts, or slots for treats. These features keep your cat busy and curious. Small bells or balls inside a hollow toy can catch your cat’s attention. Avoid tiny parts that your cat can swallow. Interactive designs help your cat stay active and happy.
Ensuring Durability
Durability matters because cats can be rough with toys. Use strong materials like PLA or PETG for printing. Check the design for weak spots or thin walls. Solid, thick parts last longer and resist bites. A durable toy saves money and time. It also keeps your cat safe from broken pieces.

Credit: resins3d.com
Selecting Materials
Choosing the right material is key to a safe and fun cat toy. Not all 3D printing filaments are safe for pets. Some can break easily or have sharp edges. Others might be toxic if chewed. Picking the right material helps keep your cat happy and safe.
Best Filaments For Safety
PLA is a popular filament for pet toys. It is non-toxic and easy to print. PETG is another good choice. It is strong and resistant to chewing. Avoid filaments with chemicals or strong smells. Always check if the filament is pet-safe before use.
Flexible Vs Rigid Materials
Flexible filaments like TPU create soft toys. These toys bend and stretch without breaking. Cats enjoy toys they can bite and squeeze. Rigid filaments like PLA make solid toys. These are good for scratching or batting. Choose based on how your cat plays.
Eco-friendly Options
Eco-friendly filaments help reduce waste. PLA is made from plant materials and biodegrades over time. Some brands offer recycled PETG or biodegradable TPU. These options protect the environment and keep your cat safe. Think green when selecting materials.
Preparing The 3d Model
Preparing the 3D model is the first step to making a perfect cat toy. You need a clear and ready design before printing. This part ensures your toy fits your cat’s size and play style. It also helps avoid printing errors that waste time and material.
Follow these tips to get your 3D model ready for a smooth printing process.
Using Free Design Software
Many free programs help create or edit 3D models. Tinkercad and Blender are popular choices for beginners. These tools allow you to design simple shapes or modify existing files. They work well on most computers and have easy tutorials online.
Start by opening your chosen software. Import a ready-made cat toy model or create your own. Use basic shapes like spheres or cylinders to form the toy’s parts. Save your work often to avoid losing changes.
Customizing For Size And Features
Adjust your model to fit your cat’s size. Small cats need smaller toys. Larger cats may need bigger, stronger ones. Change the dimensions in your software to match these needs.
Add fun features like holes for bells or soft parts for scratching. These details make the toy more interesting. Keep the design simple to avoid weak parts that break easily. Balance fun and safety in your design.
Checking Model Integrity
Before printing, check your model for errors. Use the software’s tools to find holes or overlapping parts. These problems can cause printing failures or weak spots in the toy.
Fix any issues by filling holes and smoothing surfaces. Ensure the model is solid and ready to print. This step saves time and material by preventing mistakes during printing.
Printer Setup And Settings
Setting up your 3D printer correctly is key to making a great cat toy. Proper setup ensures the print is strong, smooth, and safe for your pet. Adjusting the right settings helps avoid errors and saves material.
Calibrating Your Printer
Start by calibrating the printer bed. A level bed makes sure the first layer sticks well. Check the nozzle height and adjust it close to the bed without touching. This prevents warping and poor adhesion. Run a test print to confirm the calibration is correct.
Optimal Layer Height And Infill
Choose a layer height between 0.1 mm and 0.2 mm for good detail. Thinner layers show finer details but take longer. Use 20% to 30% infill for a balance of strength and weight. Higher infill makes the toy durable but uses more filament. Lower infill saves material but may weaken the toy.
Adjusting Print Speed
Set print speed to 40-60 mm/s for better quality. Slower speeds reduce defects and improve layer bonding. Fast speeds can cause stringing or gaps. Adjust speed depending on your printer’s capability and filament type. A steady speed helps produce a smooth finish.
Printing The Cat Toy
Printing the cat toy is an exciting step in making a fun item for your pet. This process brings your digital design into the real world. It needs care and attention to create a safe and durable toy. Follow these simple steps to print your cat toy successfully.
Starting The Print
Begin by preparing your 3D printer. Check the printer bed is clean and level. Load the filament that suits your design. Use pet-safe materials like PLA. Open your design file and adjust the settings for speed and temperature. Start the print and watch the first few layers carefully. These layers are important for a strong base.
Monitoring Progress
Keep an eye on the print as it grows. Check for any signs of warping or lifting from the bed. Listen for unusual noises from the printer. Pause the print if you see problems forming. Small issues fixed early can save the whole print. Stay nearby until the print finishes to catch problems fast.
Troubleshooting Common Issues
If the print stops sticking, clean the bed and re-level it. Strings or blobs can mean the temperature is too high. Lower the heat or slow the print speed. If layers do not stick, increase the extrusion temperature slightly. Watch the filament feed; if it jams, clear the blockage carefully. These fixes keep your print smooth and your cat toy strong.
Credit: www.printables.com
Post-processing Steps
Post-processing is an important step after 3D printing your cat toy. This part makes the toy safe and nice to look at. It removes rough edges and any leftover material. The process also helps the toy last longer. Follow these steps carefully to get the best results.
Removing Supports
Supports hold your print in place during printing. After printing, you must remove them. Use pliers or cutters to pull off the supports gently. Take care not to break the toy. Small pieces can be trimmed with a hobby knife. Removing supports makes the toy ready for further finishing.
Sanding And Smoothing
Sanding smooths out rough spots and bumps. Use fine-grit sandpaper for best results. Sand the entire surface evenly. This step removes layer lines from printing. It also prevents scratches that could harm your cat. Wipe away dust with a soft cloth after sanding.
Adding Finishing Touches
Finishing touches improve the toy’s look and feel. Paint the toy with non-toxic paints safe for pets. You can also add a clear coat for shine. Attach soft materials like felt for extra fun. Check all parts are secure and smooth before use.
Safety Tips For Your Cat
Keeping your cat safe is the top priority when 3D printing a toy. Cats are curious and love to chew and bat at their toys. A safe toy prevents choking, poisoning, or injury. Below are key tips to make sure your 3D printed cat toy is safe and fun.
Non-toxic Materials
Use only pet-safe, non-toxic filaments for printing. PLA is a good choice because it is made from natural materials. Avoid materials with harmful chemicals or additives. Your cat will chew and lick the toy, so keep health risks low.
Avoiding Small Detachable Parts
Design the toy without small pieces that can break off. Small parts can cause choking or blockages in your cat’s throat. Print solid toys or securely attach all parts. Check the toy carefully before giving it to your cat.
Supervised Play Recommendations
Watch your cat during playtime, especially with new toys. Supervision helps catch any problems early. Remove the toy if it shows signs of damage. Replace toys regularly to keep your cat safe and happy.

Credit: www.instructables.com
Creative Toy Ideas
Creative toy ideas make 3D printed cat toys fun and useful. Cats love toys that challenge their mind and body. With 3D printing, you can design toys that fit your cat’s play style perfectly.
These toys keep cats active and happy. They also help reduce boredom and stress. Here are some simple yet creative toy ideas to try.
Puzzle Feeders
Puzzle feeders are toys that hide treats inside. Cats must figure out how to get the food out. This encourages problem-solving and slows down eating.
Design small compartments or sliding parts with your 3D printer. You can control the difficulty by changing the size of openings. Puzzle feeders make playtime rewarding and healthy.
Interactive Balls
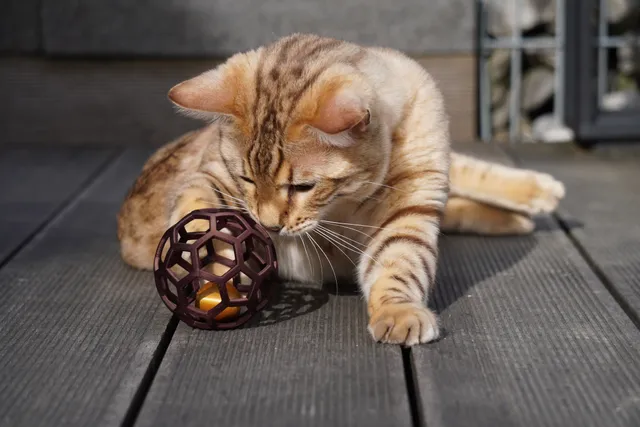
Interactive balls move or make sounds when touched. These toys attract cats’ attention and encourage chasing. Use your 3D printer to create balls with holes for bells or small rattles inside.
Print different sizes and textures to find what your cat enjoys most. Interactive balls stimulate hunting instincts and keep cats busy for longer.
Customizable Shapes
Customizable shapes let you design toys based on your cat’s preferences. Print simple shapes like fish, mice, or feathers. Add holes or slots for attaching feathers or strings.
Change colors and sizes to suit your cat’s mood. These toys are easy to update and replace. Custom shapes keep toys fresh and exciting for your cat.
Frequently Asked Questions
What Materials Are Best For 3d Printing Cat Toys?
PLA and TPU filaments are ideal for 3D printing cat toys. PLA is safe, non-toxic, and easy to print. TPU is flexible, durable, and perfect for chew-resistant toys. Avoid materials that might harm pets, such as ABS, which can release toxic fumes during printing.
How Do I Design A Safe 3d Printed Cat Toy?
Design toys with smooth edges and no small detachable parts. Ensure the size is appropriate to prevent choking hazards. Avoid sharp points and use pet-safe materials. Test the toy’s durability before letting your cat play with it.
Can I Add Interactive Features To 3d Printed Cat Toys?
Yes, you can create toys with holes for inserting treats or small balls. You can also design moving parts or puzzle-like features to engage your cat. Make sure all components are securely attached to avoid swallowing risks.
How Long Does 3d Printing A Cat Toy Usually Take?
The printing time depends on the toy’s size and complexity. Small toys typically take 1 to 3 hours, while larger or detailed toys may take 4 to 6 hours. Use a moderate print speed for better quality and safety.
Conclusion
3D printing a cat toy is simple and fun. You can create a safe and unique toy at home. Choose the right design and material for your cat. Watch your cat enjoy hours of playtime with it. Try different shapes and sizes to find the best fit.
This project saves money and adds a personal touch. Start printing and see how much your cat loves it!